Bootstrap Textarea Input
Overview
Within the pages we develop we employ the form elements to gather a number of relevant information from the visitors and return it back to the web site founder fulfilling different objectives. To complete it effectively-- meaning getting the correct responses, the right questions should be asked so we architect out forms form thoroughly, thinking about all the attainable circumstances and types of relevant information needed and actually provided.
But no matter just how precise we are in this, currently there constantly are some situations when the info we need from the site visitor is instead blurred just before it becomes actually offered and needs to spread over far more than simply the standard a single or else a few words typically completed the input fields. That is actually where the # element arrives in-- it is certainly the only and irreplaceable element through which the visitors can easily write back several sentences offering a reviews, providing a good reason for their actions or just a couple of thoughts to eventually assist us making the product or service the web page is about much much better. ( learn more here)
Efficient ways to work with the Bootstrap textarea:
Located in the most recent version of probably the most prominent responsive framework-- Bootstrap 4 the Bootstrap Textarea Button component is completely assisted immediately adapting to the size of the display screen web page gets shown on.
Creating it is very direct - all you require is a parent wrapper
<div>.form-grouplabel<textarea>for = “ - the textarea ID - "Next we want to produce the
<textarea>.form-controlfor = ""<label><textarea>rows=" ~ number ~ "<textarea>Due to the fact that this is really a responsive feature by default it spreads out the whole width of its parent element.
A bit more ideas
On the other side of coin-- there are definitely a number of instances you would prefer to reduce the responses provided inside a
<textbox>maxlenght = " ~ some number here ~ "Situations
Bootstrap's form manages increase on Rebooted form styles with classes. Apply these classes to opt in their customised displays for a even more regular rendering throughout browsers and tools . The example form below illustrates common HTML form elements that get improved designs from Bootstrap with extra classes.
Bear in mind, since Bootstrap utilizes the HTML5 doctype, each of inputs must have a
type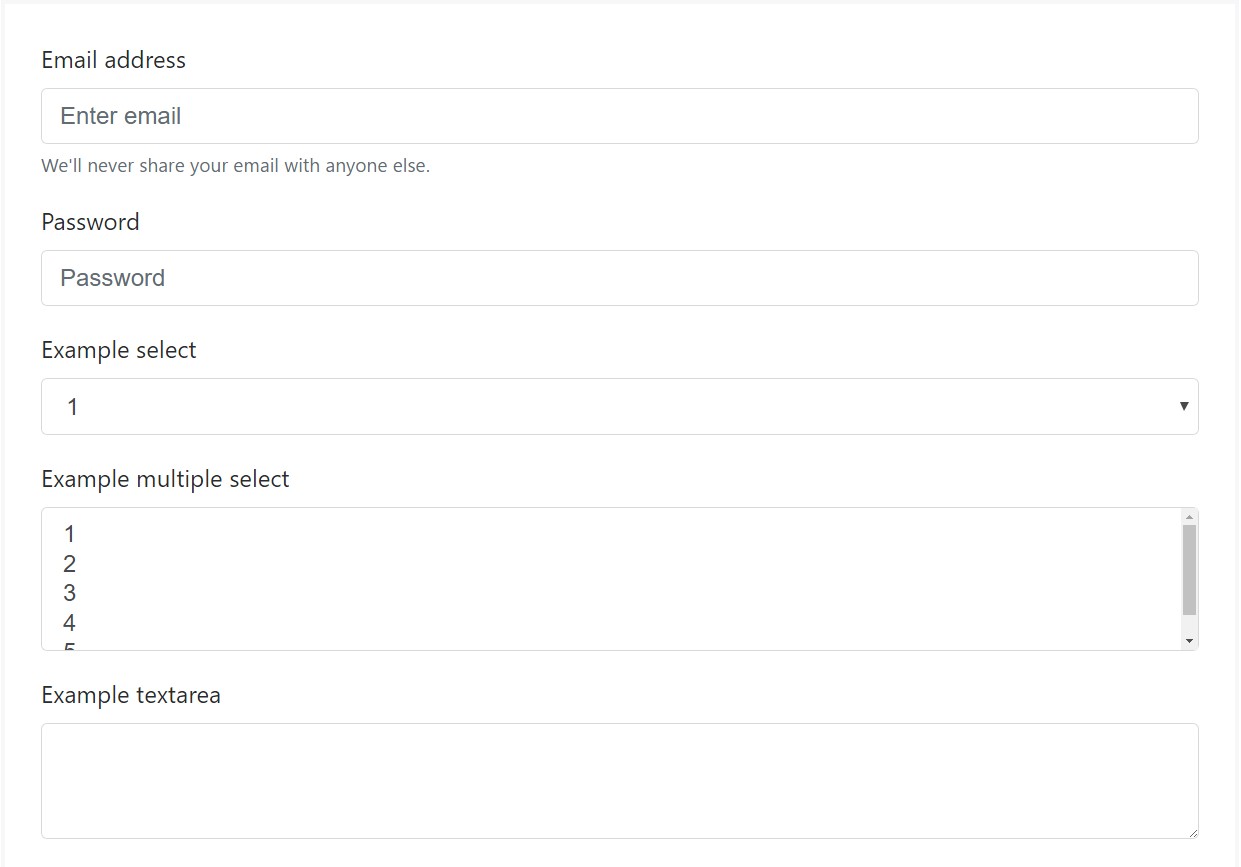
<form>
<div class="form-group">
<label for="exampleInputEmail1">Email address</label>
<input type="email" class="form-control" id="exampleInputEmail1" aria-describedby="emailHelp" placeholder="Enter email">
<small id="emailHelp" class="form-text text-muted">We'll never share your email with anyone else.</small>
</div>
<div class="form-group">
<label for="exampleInputPassword1">Password</label>
<input type="password" class="form-control" id="exampleInputPassword1" placeholder="Password">
</div>
<div class="form-group">
<label for="exampleSelect1">Example select</label>
<select class="form-control" id="exampleSelect1">
<option>1</option>
<option>2</option>
<option>3</option>
<option>4</option>
<option>5</option>
</select>
</div>
<div class="form-group">
<label for="exampleSelect2">Example multiple select</label>
<select multiple class="form-control" id="exampleSelect2">
<option>1</option>
<option>2</option>
<option>3</option>
<option>4</option>
<option>5</option>
</select>
</div>
<div class="form-group">
<label for="exampleTextarea">Example textarea</label>
<textarea class="form-control" id="exampleTextarea" rows="3"></textarea>
</div>
<div class="form-group">
<label for="exampleInputFile">File input</label>
<input type="file" class="form-control-file" id="exampleInputFile" aria-describedby="fileHelp">
<small id="fileHelp" class="form-text text-muted">This is some placeholder block-level help text for the above input. It's a bit lighter and easily wraps to a new line.</small>
</div>
<fieldset class="form-group">
<legend>Radio buttons</legend>
<div class="form-check">
<label class="form-check-label">
<input type="radio" class="form-check-input" name="optionsRadios" id="optionsRadios1" value="option1" checked>
Option one is this and that—be sure to include why it's great
</label>
</div>
<div class="form-check">
<label class="form-check-label">
<input type="radio" class="form-check-input" name="optionsRadios" id="optionsRadios2" value="option2">
Option two can be something else and selecting it will deselect option one
</label>
</div>
<div class="form-check disabled">
<label class="form-check-label">
<input type="radio" class="form-check-input" name="optionsRadios" id="optionsRadios3" value="option3" disabled>
Option three is disabled
</label>
</div>
</fieldset>
<div class="form-check">
<label class="form-check-label">
<input type="checkbox" class="form-check-input">
Check me out
</label>
</div>
<button type="submit" class="btn btn-primary">Submit</button>
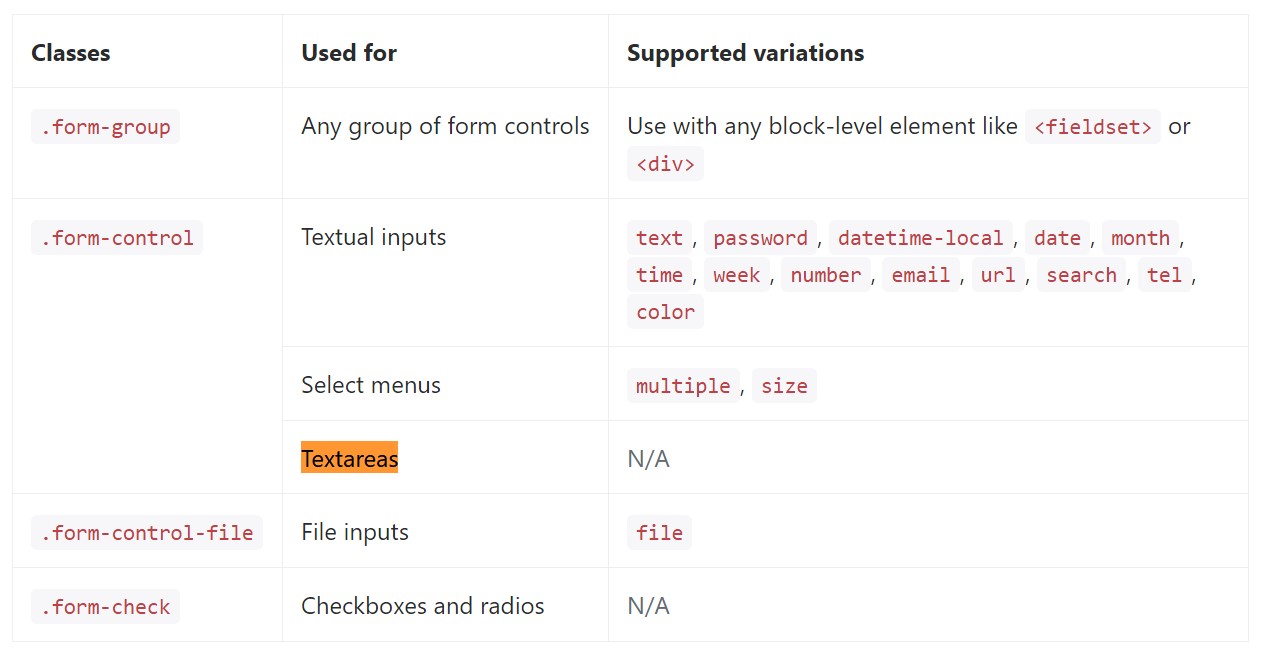
</form>Shown below is generally a full listing of the specific form commands supported via Bootstrap and the classes that customise them. Supplementary documentation is easily available for each group.
Final thoughts
So currently you know ways to start a
<textarea>Examine several online video tutorials regarding Bootstrap Textarea Input:
Connected topics:
Essentials of the textarea
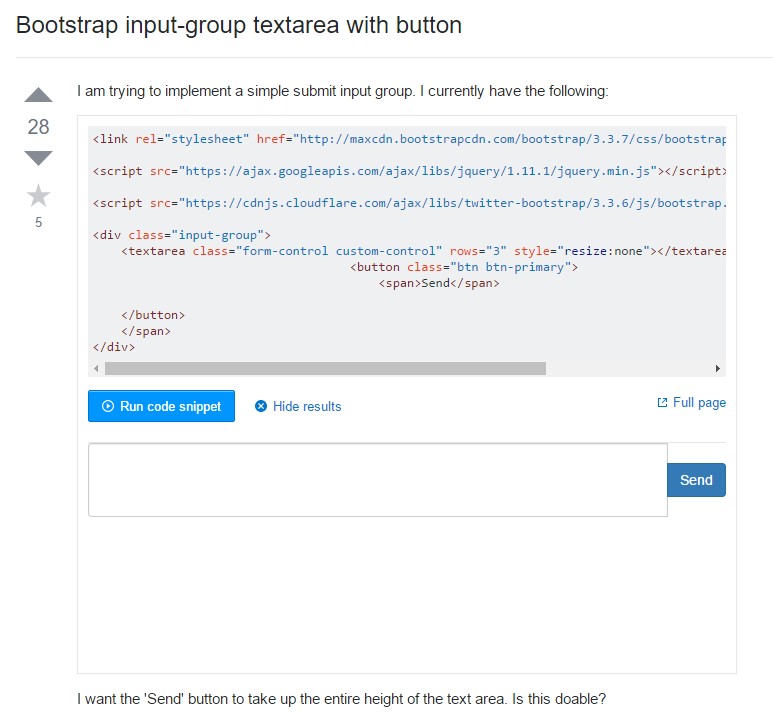
Bootstrap input-group Textarea button with
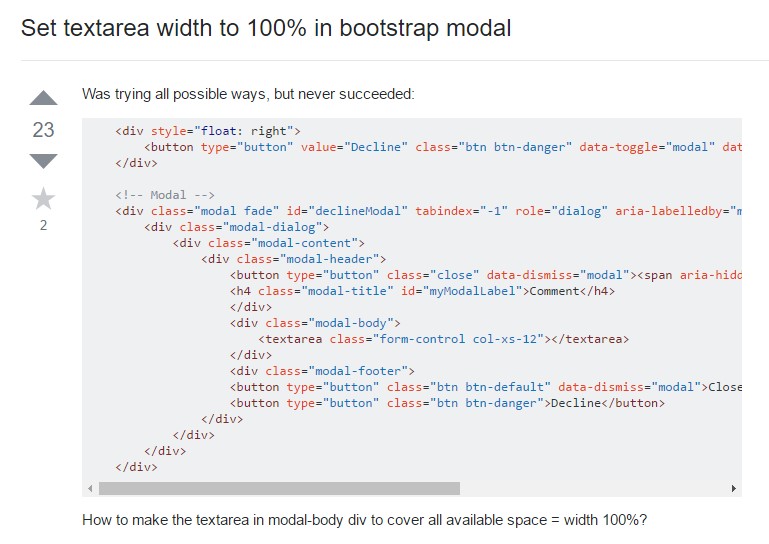
Set Textarea width to 100% in Bootstrap modal